5 Reasons to Build Tiny Gingerbread Houses (With a Free Pattern!)
Every year, Christmas comes no matter what.
Every year, with joy and lights and wonder. And now that we’re adults, Christmas comes with oh so much more. It’s still exciting and wonderful, but there’s also much to do.
I know I’m not the only one who feels this way…
Every year, a list forms in my mind: make ornaments, buy presents and wrap them up pretty, practice random acts of kindness, sing Christmas carols, watch all the Christmas movies, do a Jesse Tree.
These are all things I want to do with my family, but everyday family life is already pretty full. Adding anything extra can make us feel quite busy, and busyness is never the goal. Do you agree?
Yet there is one Christmas tradition that I truly love, one that is scattered trough my childhood memories. It’s the gingerbread house. It’s the mixing of dough and the rolling it out and the cutting of shapes. It’s the handiwork, the teamwork, the using of all my senses. We would pack on too much candy and by the end of the night everyone would feel sick because we’d all eaten way too much sugar. Perhaps what I really love, though, is simply the smell of gingerbread. Put molasses and cinnamon in anything, and I am game! Yum!!
My oldest son asks every year if we can buy a gingerbread house kit. It starts as soon as they hit the shelves and it never stops. While I know this would be the easiest way, I am a stickler for the homemade and I tell him no because we can make one at home with much better ingredients. This year, I got to spend some one-on-one time with him measuring and cutting and creating our pattern (a tiny architecture/STEM lesson wrapped up in the most wonderful aromas!)
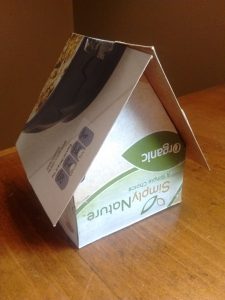
Here’s a little peak at the house pattern all cut out and taped together (just with a little bit of tape, since we would be disassembling it to trace onto our dough):
I had plans to try out some healthier gingerbread house dough, but when it came time last Friday to actually make the stuff, I used my trusty Joy of Cooking recipe. (I’m sure that if you want to make your dough, you can use whatever basic cookbook you have, or use the first basic recipe that comes up on google. Perhaps this one from King Arthur Flour. They never let me down.)
One thing I decided to do this year was to cut out enough dough for each person in my family to make their own personal gingerbread house. This would ensure that no one was fighting because someone was messing with their design or because someone’s hands were in the way or whatever.
We gave each of our children a paper plate and a little bowl of candy and we let them decorate their own houses. We sat down alongside our children and decorated our own houses too. Of course, I don’t have photos of our process but hopefully the last two sentences gives you an idea of how we did this.

So, I had the idea to build tiny, individual houses but I wasn’t sure how it would work out. Truly, it was great.
5 Reasons to Build Tiny Gingerbread Houses:
1.) Individual Creativity. No one fought over what kind of design to make because everyone was allowed to do whatever they wanted to their own house.
2.) Fairness. My husband had the brilliant idea to ration out the candy into individual bowls (I used washed yogurt containers, which I always save for things like painting and to-go lunches and now, for building gingerbread houses). This way, everyone was sure to get the same amount of goodies and no one complained that “So-and-so ate all the peppermints.”
3.) Preventing Candy Hangovers. Everyone got an appropriate amount of candy and could do with it what they wanted. Our smallest child ate most of her candy while the rest of us were decorating our houses. We had figured that would happen, but in the end it was fine because she had the same as everyone else.
4.) Structural Integrity. I seem to recall gingerbread houses being finicky, and the roof caving in or the foundation cracking. However, my idea to build tiny gingerbread houses had the added benefit of lighter-weight pieces. Therefore, the house itself wasn’t so complicated to put together and it was absolutely structurally sound.
5.) Easy Icing Glue. Because our tiny houses were not so heavy, we were able to use a simple powdered sugar + milk icing to build them. That’s right, no egg whites! We just made sure the icing was kind of thick so that it would dry faster. We sat down together to build the houses, went downstairs to watch Rudolph the Red Nosed Reindeer, and came back upstairs to do our decorating. That 45 minutes gave the frosting enough time to dry so the candy could be applied without any collapsing. (Note: Because our children are so little, my husband and I basically put the houses together. We applied the icing and helped the kids position their pieces so that everyone would actually end up with a house and not a big pile of crumbs.)
Simple Steps:
***Things you will need to make your own gingerbread houses: Dough, candy, powdered sugar and milk, bowls, paper plates.
1.) Print my FREE TINY GINGERBREAD HOUSE PRINTABLE . Cut out your pattern (I made my pattern pieces with an old cereal box. You can make your pattern pieces with paper, but something heavier will be much easier to work with.)
2.) (Optional) Build the house using your pattern and a few pieces of tape. (While unnecessary, I found that this helped my son and I both see what we were about to do with the gingerbread and to make any adjustments we wanted.)
3.) Make gingerbread dough and roll out to about 1/4″ thickness. I used one recipe of gingerbread dough and we made 5 tiny houses with it, and we had leftover dough that I froze for later use.
4.) Using your pattern, cut out enough pieces of gingerbread to make as many houses as you need. You will need 2 pieces of roof, 2 pieces of side, and 2 pieces of front/back per house Basically, my printable makes one house.
5.) Bake the pieces of gingerbread. When transferring your shapes to the baking pan, be gentle because they will stretch a little (another benefit to tiny houses: if the pieces aren’t perfect, the icing will still be able to hold the house together!)
6.) Once the cooked dough is cool, mix together a few cups of powdered sugar with a little bit of milk (remember, you want the icing thick, so don’t add a lot of milk. A good rule of thumb is to add one tablespoon at a time until your icing is smooth and spreadable.) Now you’re ready to assemble your house!
7.) Once your house is assembled, get out your candy and have at the decorating!
8.) Take lots of pictures and let me know how your houses came out!!